The SSD Power Consumption Hoax

Flash SSDs Don’t Improve Your Notebook Battery Runtime – they Reduce It

Flash-based solid state drives (SSDs) are considered to be the future of performance hard drives, and everyone seems to be jumping on the bandwagon. We are no exception, as we have been publishing many articles on flash-based SSDs during the last few months, emphasizing the performance gains and the potential power savings brought by flash memory. And there is nothing wrong with this, since SLC flash SSDs easily outperform conventional hard drives today (SLC = single level cell). However, we have discovered that the power savings aren’t there: in fact, battery runtimes actually decrease if you use a flash SSD.

Could Tom’s Hardware be Wrong?

No, our results are definitely correct. We’ve looked at almost a dozen different flash SSDs from seven vendors over the last few months, and measured acceptable or sometimes even disappointing power requirements with most flash SSDs. In an effort to determine the actual impact on notebook systems, we took four SSDs that we had available in our test lab, and ran a series of Mobilemark benchmark runs on a Dell Latitude D630 notebook. We found runtime differences of up to one hour (!) when using a flash SSD compared to a high-performance 7,200 RPM 2.5” notebook hard drive.

Will this Slow Down the Flash Memory Hype?

We don’t think so. Flash is cool, because it’s expensive, and because it does provide significant performance advantages (when SLC flash is used). But while our results are interesting for most users, they will be shocking to road warriors. You will see very clearly in the benchmark section that theory and real life are sometimes entirely different.

We still believe that flash-based drives will be the future for the performance segment, but they must not become a key component for energy-efficient notebooks and ultra-portables — where performance is secondary — as long as their average power consumption is higher than that of conventional 2.5” notebook hard drives. In fact, even a high-performance 7,200 RPM 2.5” drive provided better overall battery runtime than most of the flash SSDs we put through the Mobilemark test. 

Memoright SSDs: The End of Hard Drives?

The HDD is Beaten

About six months ago, we reviewed Mtron’s Flash SSDs (Solid State Drives), which were the fastest hard drives for desktop PCs until the launch of Western Digital’s new VelociRaptor. Although the VelociRaptor is a conventional hard drive and therefore it cannot offer the extremely quick access times of transistor-based storage media, it is the best choice for most applications - and it offers almost 10 times the capacity at a fraction of the SSD drive’s cost. However, we found an even better drive for the real enthusiast: the Memoright SSD MR25.2-032S, which leaves any other conventional hard drive in the dust as far as performance goes.

ssd memoright

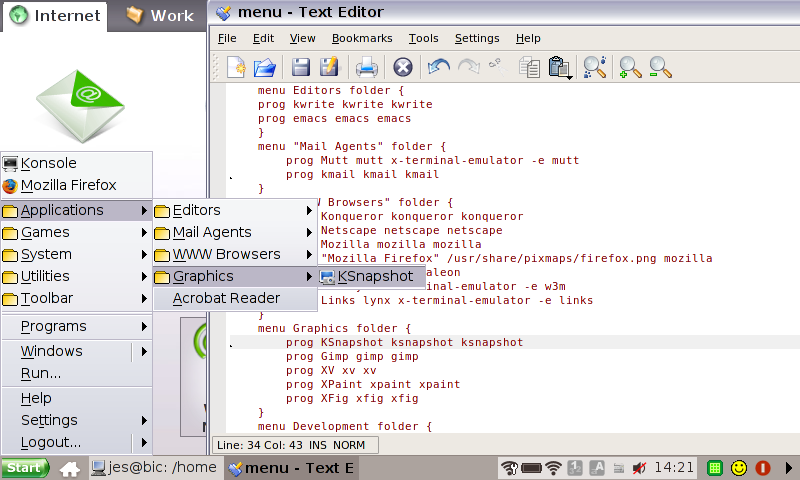
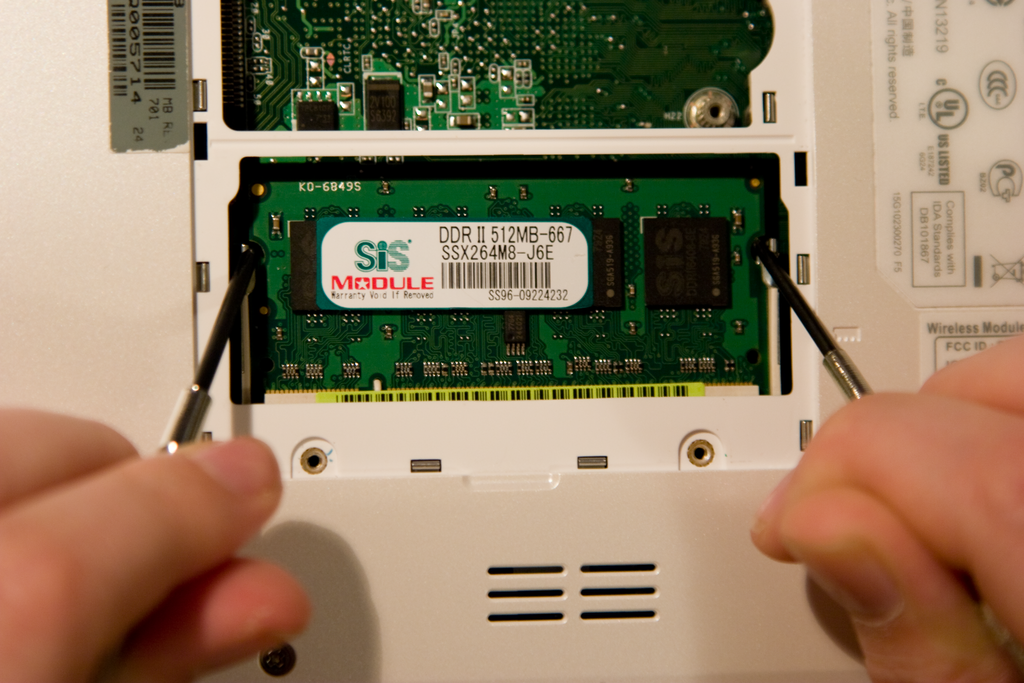
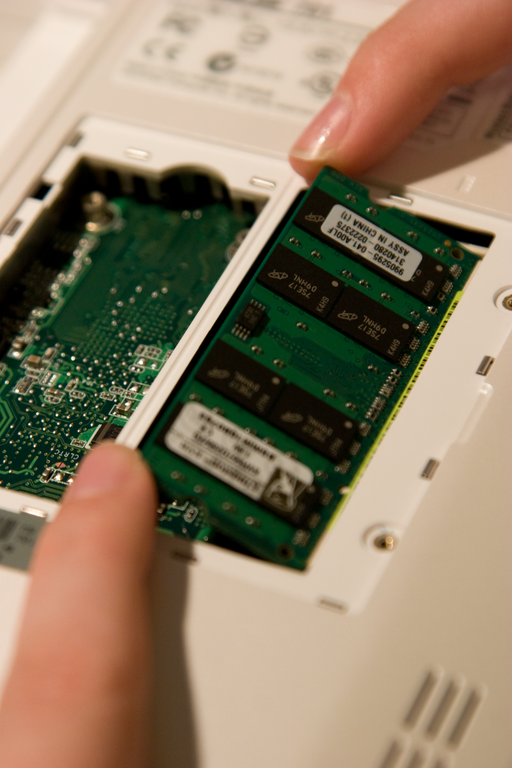
It has become difficult to keep track of the developments in the Flash SSD storage market. Flash SSDs look and behave like mechanical hard drives, except that flash memory devices store data in the same way that your motherboard’s firmware device stores BIOS information. USB thumb drives use flash memory as well. Flash memory can offer good throughput and virtually zero access time, although write throughput and write access times can be clearly slower than the read values. While Flash memory doesn’t generate as much heat as a hard drive spinning at high revolution speeds and it’s also extremely robust, the media does not yet offer the capacities that PC hard drives are expected to have. A 2.5” notebook hard drive, for example, can store up to 500 GB and a 3.5” desktop drive’s capacity can total up to 1000 GB.

However, flash-based drives can come in 3.5”, 2.5”, 1.8” or even smaller sizes. Remember that memory cards such as CompactFlash, SD or memory sticks are all based on flash memory. Flash memory typically requires much less power than a conventional hard drive does, and it withstands shocks, such as when a laptop is dropped, better than conventional drives. Flash SSD storage capacities have reached 128 GB, although only 32-GB flash SSDs have moved into a price range that can be considered affordable.

But why do we make such a big deal about SSDs in the first place? There are two simple reasons: performance and energy efficiency. While traditional hard drives do not directly accelerate processing performance for CPU-intensive tasks or graphics performance, they have a very noticeable impact whenever the operating system, applications or application data are launched or terminated. Once software can be executed or data can be accessed from within the system’s main memory, the core components can show their potential. Until this is the case, data has to be loaded or stored from or to the hard drive, which is why we still have to wait seconds or even minutes for Windows or applications to start. Flash SSDs can significantly reduce user idle time by providing a good mix of quicker data access and good throughput. Lastly, flash memory devices can be more energy-efficient than conventional hard drives. However, an SSD’s energy power consumption depends on the number of flash components the device has for its capacity. Flash memory’s power consumption also can vary (MLC, SLC – see next page).

We already looked at various Flash SSD offerings froSamsungSandiskRidata and the Korean manufacturer Mtron, which has been offering the fastest flash SSD drives to date. Executives from SSD specialist DV Nation read our review of the Mtron drives and offered flash SSD from Memoright for our tests. A company representative said the devices would be an even better choice. He was right

ow Can Battery Runtime Be Shorter?

It’s important to answer this question, because it doesn’t seem like this should be the case. Most flash SSDs show power requirements in idle and when under load that are comparable to those of conventional 2.5” notebook hard drives. A typical 2.5” hard drive based on rotating magnetic platters usually requires between 0.5 W and 1.3 W when it runs idle, and from 2 W to around 4 W when it is under maximum load. Peak load occurs when the actuator has to move the heads back and forth on the disc surface due to lots of random accesses.

Let me emphasize a part of my last sentence: “when the actuator has to move the heads.” It’s important to understand that a conventional hard drive will only reach its maximum power requirement when you’re requesting random data that’s distributed all over the medium. In the case of sequential reading or writing, hard drives will not require much more than the idle power, as there is no energy-intensive acceleration and deceleration of the actuator.

Flash SSDs Only Know Two Power States

In contrast, flash SSDs only seem to know two states: active or idle. We don’t have specific information on this, but we received confirmation from two vendors that many flash devices don’t feature power saving mechanisms yet. On the one hand, the entire industry is looking to improve MLC flash to enable larger flash SSDs at sufficient performance levels. On the other hand, wear leveling algorithms are more important than power saving features, as durability may be an issue with SSD drives.

So while conventional hard drives may operate at relatively low power when little movement is required — such as during sequential read access — flash based drives do not. They will draw their maximum power level constantly when in use, and as a consequence, simply spend more total time drawing maximum power than conventional drives.


The Return of the Original Microsoft Geek Icons, 30 Years Later

Microsoft employee in 1978


27th june now in 2008 all 

Comments: Front row (left to right): Bill Gates, Andrea Lewis, Miriam Lubow, Marla Wood, and Paul Allen. Back row: Bob O'Rear, Steve Wood, Bob Greenberg, Marc McDonald, Gordon Letwin, and Jim Lane. Not pictured is Bob Wallace, who has passed away.

Hacking the Eee PC

ASUS' diminutive sub-notebook, the Eee PC, has so far exceeded expectations and is sold out virtually everywhere. Its simple interface and wallet-friendly pricing have contributed to making the Eee the most popular gadget this season.

It's in the hands of the power user that the Eee really shines. With hardware support already taken care of, the Eee offers an opportunity for beginning-to-intermediate Linux users to customise themselves a flexible Linux-based tool using the Eee's easy or full desktop mode.

In this article, we take you through tweaking your Eee, although in the interest of preserving your warranty, most of the hacks here are focused on software. The first and most important hack is to read the manual that came with your Eee to make sure you're completely up to date on everything. When you read the manual (because you are going to read it, right?), you'll notice that ASUS mentions the keyboard shortcut Ctrl-Alt-T to launch a terminal. Gaining root on the default Eee install is as simple as issuing the command:

sudo -s 

There is no password; any person who can open a terminal is able to gain root.

ASUS' easy mode uses a customised IceWM (www.icewm.org), a standard X11 window manager that's been around for a very long time. It's relatively easy to customise to your liking. The first step is creating a directory for local modifications. Open a terminal using the aforementioned keyboard shortcut, and type:

mkdir ~/.icewm cp /etc/X11/icewm/* /home/user/.icewm/ 

This creates a local customisation directory and copies the ASUS IceWM configuration into it, ready for you to modify. As not all of the software that ships with the Eee is accessible through the easy mode launcher, the first useful thing to tweak on the Eee is to add the IceWM panel menu and edit it to add those applications that aren't exposed through the easy mode interface.

To enable the menu, edit ~/.icewm/config, and scroll down to the option named TaskBarShowStartMenu. Change the 0 in the uncommented value to 1, and save the file. You need to restart your Eee for the menu to show up:

#  Show 'Start' menu on task bar # TaskBarShowStartMenu=1 # 0/1 TaskBarShowStartMenu=1 

Figure 1. The IceWM Menu, with the Menu File in the Background

To edit the menu, open ~/.icewm/menu in your favourite editor. The menu format is pretty simple, following the syntax:

prog label icon command 

where labelicon and command are replaced with the appropriate entries for the application you want to launch. For example, to add an entry that launches Konsole, the KDE terminal emulator, you would create an entry as follows:

prog Konsole konsole konsole 

Submenus are described with the following syntax:

menu "Label" {  } 

Program entries or further submenus are defined between the curly braces.

The first thing we all thought on using the Eee when we first received it was “the Windows XP theme doesn't look attractive on XP, let alone on Linux. How the heck do we change this abomination?”

You'll be pleased to know that this is extremely simple, now that the menu is enabled. The biggest theme repository for IceWM is at themes.freshmeat.net/browse/925, with hundreds of themes from which to choose. Once you've downloaded a theme, create the folder ~/.icewm/themes, and extract the theme to that folder. It will now be selectable from the IceWM menu under Settings→Themes.

Figure 2. A broad selection of attractive themes are available for IceWM.

You can find a wide range of other customisations by reading the comments in the ~/.icewm/preferences file. Some notable ones are showing the workspace switcher on the panel and adding a CPU meter. Traditional window manager settings, such as focus model, are available as well.

With a built-in Webcam, it's a shame that the Eee PC didn't ship with the Linux beta of Skype that allows video calling. It is, however, easy to install by hand. Navigate to www.skype.com/download/skype/linux, and elect to download not the current stable version, but the beta. When it asks you to select your distribution, download the package for Debian Etch. Once you've downloaded it to disk, open a terminal and navigate to where the file was saved. Type the following to install the package:

dpkg -i  skype-debian_2.0.0.27-1_i386.deb 

The version number of the package may have changed since the time of this writing. As this upgrades the version of Skype already installed, the Skype launcher will launch the new version.

Figure 3. Some Linux mascots take time out from their busy schedule to test video calling for us.

During the course of adding applications to the menu, the observant will notice that the Eee ships with most of KDE installed. During its development phase, the Eee exposed an option to enable a full desktop mode with a complete KDE 3.4 desktop. The most elegant solution for enabling the full desktop is to install a package that does the configuration for you from wiki.eeeuser.com/howto:getkde. This package essentially downloads the packages for kicker and ksmserver, and modifies the ASUS startup scripts. It adds an option to log in to full desktop mode from the easy mode shutdown dialog. To get back into easy mode, there is an option in the K menu. This page also details the manual methods for enabling full desktop mode.

Figure 4. A Full KDE Desktop

Adding more software from a Xandros or Debian repository is the next logical step in customising the operating system that ships with the Eee. For us, the Eee requires only the addition of Emacs and Subversion to be a great portable hacking tool. You can use any Debian Sarge repository or a Xandros 4.0 one, as shown below. There are a few caveats though. As the Xandros running on the Eee is heavily customised by ASUS, it's very easy to end up with the Eee in an unbootable state if you allow apt to upgrade too much. Although it's not a complete solution, apt pinning can be used to ensure that the ASUS repository always takes priority for a package.

Add your repository to /etc/apt/source.list with your favourite text editor as root, either your local Debian Sarge repository or the Xandros one below:

deb http://xnv4.xandros.com/4.0/pkg xandros4.0-xn main   ↪contrib non-free 

Then, create the file /etc/apt/preferences, and add the lines:

Package: * Pin: origin update.eepc.asus.com Pin-Priority: 999 

As apt sources default to a lower priority, this ensures that packages from the ASUS repository are prioritised. It's still possible though to break your Eee by installing packages willy-nilly. If it looks as though an action is going to upgrade a large number of packages, especially if it looks like what it's upgrading is all of KDE, cancel the change.

This limitation can be extremely frustrating if you want to make more drastic changes to your Eee PC's installed packages. Another option is to install a generic Linux distribution on the Eee. eeeXubuntu (wiki.eeeuser.com/ubuntu:eeexubuntu:home) is a version of the Xubuntu 7.10 distribution with Eee-specific drivers integrated and tweaks for low-resolution displays. It's an excellent choice if you want a more modern distribution on your Eee but would prefer not to compile the drivers from ASUS by hand.

The wiki page has in-depth instructions on how to create a bootable USB stick for your Eee. Boot your Eee from the USB stick by pressing Esc at boot time to get to the boot options menu, and from the GRUB bootloader, select the option to load eeeXubuntu with Eee-specific drivers and fixes. From there, it's all very familiar. Click the Install icon on the desktop once the live CD loads, and navigate your way through the Ubuntu installer.

If your Eee has 512MB or more of memory, you probably can get away with not creating a swap partition. In our testing, running Firefox, Pidgin and Thunderbird, the Eee was using approximately 300MB of memory, minus buffers/caching. If your Eee has 1,024MB or more of memory, you'll never notice the difference.

Opting out of swap, however, does have the side effect that hibernate to disk is disabled. The Eee does have suspend to RAM support under eeeXubuntu, but this level of suspend does consume a fair amount of battery. Leave your Eee suspended for 24 hours, and expect to see your battery down to half when you resume it.

Figure 5. eeeXubuntu is a customised Xubuntu for the Eee PC.

The simplest and most rewarding Eee hardware mod is upgrading the built-in memory. Note: this mod requires removing a sticker that claims its removal will void your warranty. According to a public statement by ASUS at usa.asus.com/news_show.aspx?id=9223, this is not the case, and upgrading your memory will not void the warranty on your Eee. However, Linux Journal takes no responsibility for any damages to your Eee or loss of warranty incurred by following this advice.

The Eee PC takes a single SODIMM of DDR2667, in either 512, 1,024 or 2,048MB. That's right, the Eee PC can be upgraded to an impressive 2GB of memory.

To upgrade the memory on your Eee, you need a set of small electronics screwdrivers and a clean surface that's safe for handling static-sensitive equipment.

If you haven't installed memory before, Linux Journal recommends you enlist the help of a professional or a hardware-minded friend.

Ensure that the Eee is shut down (not suspended), and unplug it from the power. Turn the Eee upside down and remove the battery.

Using a very small Phillips screwdriver, remove the two screws in the memory panel. One is covered by a sticker that will tear easily if you simply remove the screw as though the sticker was not there.

Use a small flatblade screwdriver very carefully or a fingernail to lever up the memory compartment. Put the memory compartment cover and the screws to one side.

To remove the memory that shipped with your Eee, carefully use a pair of small screwdrivers or your fingers to lever the clips outward. The memory module will pop upward when it is free of the clips. Remove the module from the slot, taking care to touch only the very outside edges of the module.

Figure 6. Removing the Module

Place the module aside in a static-safe place, and remove the new module from its packaging. Place it in the slot at a 45-degree angle, as shown in Figure 7, taking care that the notch on the module matches the key on the slot. When the module's base is securely slotted in, it can be carefully lowered into position by pushing the top corners of the module backward with your fingers, so that it lies flat against the Eee's motherboard. The metal clips should snap over the sides of the module with a satisfying click when it's properly in place. Once the memory is secure, replace the memory compartment cover and ensure that all sides have clicked down.

Figure 7. Installing the New Module

If you're anything like us, at this point, you'll hunt all over the desk searching for the screws only to find them 20 minutes later stuck to the magnetic closure on the MacBook. Replace the two screws to secure the memory compartment cover, and insert the battery again. It's always a good idea to run memtest86 over any new memory you install, which is an option from any recent Ubuntu live CD or the eeeXubuntu bootable USB stick if you made one earlier.

It's pretty easy to see how the Eee has taken the personal computer market by storm. It's cheap, friendly and oh-so-very hackable, with something for everyone. There are myriad other hacks not covered here, from installing Linux distributions and adding the drivers yourself to soldering additional gadgets to the motherboard. In fact, that's what we're off to do right after we submit this article—solder a mutilated Bluetooth dongle to the motherboard, as now we won't get in trouble if we break it.

Have fun hacking your Eee, but remember—installing Windows is cruel to Eee PCs and not endorsed byLinux Journal!

Jes Hall is a Linux Technical Specialist and KDE developer from New Zealand. She's passionate about helping open-source software bring life-changing information and tools to those who would otherwise not have them.

Core 2 Duo E8400 Dual Core Processor

Description:Core 2 Duo E8400 Dual Core Processor
 Manufacturer:Intel
 Lowest Price:$191.10
 User Reviews:5 Star Review
(4.93 / 5.00)
(Read 14 Reviews)
 Rebates:(None)
Quick Glance 
 Processor Socket:Intel Socket T (LGA775)
 Processor Class:Intel Core 2 Duo
 Processor Type:2
 Bus Speed:1333MHz
 Processor Speed:3000
Processor Speed + Class 
 Bus Speed:1333MHz
 Processor Speed:3 GHz
 Processor Class:Intel Core 2 Duo
Physical + Memory Specifications 
 Included Fan Type:ATX
 L2 Cache Size:6 MB
 Number of Processor Cores:2
 Processor Socket:Intel Socket T (LGA775)
Warranty 
 Warranty Information:3 Year Limited Warranty

How To Overclock Your Graphics Card

Introduction

Overclocking is more popular than ever. And since it’s so easy to boost the frequency of your Intel processor, it would be a shame not to. But CPUs aren’t the only components that can be overclocked. The GPUs on graphics cards can also be speeded up, and so can their memory. And since an affordable card only differs from more expensive ones in its clock speed, overclocking can be your key to some real savings.

Overclocking a GPU is a less common process than overclocking a CPU, and above all, it’s more complex. One of the reasons for that is that a graphics card’s BIOS is not as easily accessible as a motherboard’s. This article will shed some light on the different methods that can be used and the results you can expect when overclocking your graphics card.

Software or Hardware Overclocking?

It turns out that there are several ways to overclock your graphics card. We’ll take a look at each one in turn. First of all, you should know that you can overclock your card either temporarily, using Windows software utilities, or permanently by flashing your BIOS.

The Flexibility of Software

RivaTunerThe first method is the best known. There are numerous utilities for AMD/ATI and Nvidia graphics cards. Their functions are often similar. The best ones let you set the operating speed of the GPU and the memory, but also the cooling power, and some let you load complete overclocking profiles and configurations of 3D functions to suit the application you’ll use. In fact, these utilities multiply the possibilities offered by the cards’ drivers. This implies that the ForceWare or Catalyst drivers are not totally ignorant of overclocking... And in fact, Nvidia and especially ATI are emphasizing overclockability more and more, which has become a strong sales argument. Software overclocking is very flexible to use (generally all you do is slide the frequency cursors and click "OK"), but it’s not free of drawbacks. It depends on a memory-resident program. That program consumes a small part of system resources, and can crash. The programs can contain bugs, or be incompatible with certain cards, certain driver versions or certain operating systems. What’s more, each time you re-boot the system you have to reconfigure everything.

Under the Hood

In short, a more permanent, more robust solution would be preferable – as with CPU overclocking, which won’t change unless you voluntarily modify the motherboard’s BIOS. And in fact, it works the same way with a graphics card. Permanent overclocking requires a change to the settings that are "hard-wired" in the card’s own BIOS. But while all you need to do to access your motherboard BIOS settings is press F1, F2 or Del when your PC is booting, the graphics card’s BIOS is not that easily accessible. You need a special utility to read and edit settings and save the new version, which will then be written to the card itself by flashing with yet another utility. Sound complicated? It may be, but it’s not at all impossible. And we’re here to tell you how to do it.

Keep Cool and Spend Your Money

overclocking graphics cardHowever, if all this scares you, you can always go with a factory overclocked version, when the vendor does it for you. Models like this are extremely common, since third-party graphics cards manufacturers have found overclocking to be one way to set themselves apart from the competition. Certain ones, like XFX, may even owe all their success to the wide range of overclocked models they offer. But you should know that most of the time, pre-overclocked cards make you pay a lot for the few extra performance percentage points they offer.

Test configuration

Our tests were run on our reference system with an Asus P5E3 motherboard, an Intel QX6850 processor and 2 GB of Crucial DDR3. The operating system installed was the 32-bit version of Windows Vista SP1. For each card, we used the most recent versions of the drivers available at the time of the test – that is, ForceWare 174.53 and Catalyst 8.3.

overclocking graphics card


Overclocking Nvidia: GeForce 9600 GT

But enough talk – let’s get down to brass tacks. We’re going to show you how to overclock your graphics card using two examples of recent cards – not that overclocking is only possible with new GPUs. It just seemed to make more sense to focus on today’s technology rather than yesterday’s.

Choose your weapons: GeForce 9600 GT and RivaTuner

Geforce 9600 overclockingWe’ll start with a card from Nvidia, a GeForce 9600 GT. This card, which we tested at its recent launch, is based on a G94 GPU, a version of the G92 used in the GeForce 8800 GT and GTS V2 512 MB launched late in 2007. The G92 was itself a version of the G80 in the original GeForce 8800s that hit the market late in 2006. In other words, this is a processor with a well-known architecture and overclocking utilities that have been available long enough for us to become familiar with. The key utility for overclocking a GeForce is RivaTuner (downloadable here), an application that’s been around for some time and that gets its name from the Riva, the first GPU Nvidia produced a few years before the GeForce series. So, RivaTuner is perfectly mature and compatible with all Nvidia GPUs, and it’s updated very regularly. It’s a must-have.

Once you’ve downloaded, installed and launched the utility, click the little arrow to the right of “Customize,” in the second drop-down list entitled "Driver Settings." Select the icon that looks like a graphics card, "System settings."

RivaTuner System Settings

The dialog that opens more or less speaks for itself. You can see three cursors – Core Clock, Shader Clock and Memory Clock.

RivaTuner System Settings Menu

Their function needs no explanation. But we should stop and take a closer look at the second one, for those of you who aren’t familiar with the architecture of Nvidia graphics processors. Since the GeForce 8, Nvidia GPUs have used two different clocks. One affects only the scalar ALUs (the famous stream processors) that form the unified shader units. The other affects the rest of the GPU. By default, these two frequencies are related by a ratio of approximately 2.5 (the ALUs run faster). This value isn’t universal to GeForce 8s, however, since the frequency increases by stages, as we’ll see later on.

Geforce 8 architectureWith RivaTuner, you can increase the Core and Shader frequencies while keeping the 2.5 relation (you can also try changing that proportion). It’s not necessarily worthwhile, but it can give you a few extra MHz, since each portion of the GPU can have different frequency limits. In practice, though, you shouldn’t expect to gain all that much.


Trial and Error

Since each individual chip has its own capacities, there’s no way to know in advance what frequency you can push your GPU to and still maintain stable operation. So, overclocking has to be done gradually – by increments of 20 MHz, say. You start by increasing the speed of the GPU (and the shaders). At each level, quickly test the stability of the system by launching an application that makes a lot of 3D demands, such as a game. It goes without saying that the rest of your configuration has to be perfectly stable before you can judge the quality of the overclocking of your graphics card. Too much overclocking will cause the game to simply crash, or else cause artifacts of various types (such as groups of pixels of the same color, refresh faults, untrue colors, etc.)

Once you’ve found the limits of the GPU, it’s time to tweak the memory. You can increase memory in slightly larger frequency increments than for the GPU – for example 50 MHz. If at some point you start seeing artifacts, go back to the previous level and bump the frequency up by a smaller amount (say 20 MHz).

RivaTuner Hardware Monitoring

Take care, though, because the frequency you feed into RivaTuner won’t always be the one it actually applies to the graphics card. On certain processors, including all GeForce 8s, the evolution of the frequency is not linear; it moves in stages. So, in our case, setting the GPU (Core) to 725 MHz or 735 MHz works out to the same thing – an actual frequency of 729 MHz. On the other hand, a change that appears slight can in fact cross a threshold and bump up the frequency by some 10 MHz. This somewhat delicate operation is not a real problem, since RivaTuner can check the actual frequencies. For that, go to the "Hardware Monitoring" menu (see above).

Average gains

In our case, the G94 of our reference GeForce 9600 was pretty cooperative. Clocked at 650 MHz from the factory, it was able to be increased to 767 MHz and remain stable. This had the shaders running at 1920 MHz. We tried desynchronizing, but were only able to gain 30 MHz. We were able to increase the memory from 900 MHz to 1116 MHz. On the bottom line, that works out to a jump of 18% for the GPU and shaders and 24% for the memory. Not bad, but not excellent either. It was enough of a gain, however, to catch up with the performance of an 8800 GT, which is 15% faster than the 9600 GT in its factory state.

9600 GT OC max